First run
Five minutes, assuming KiCad is installed. If it is not, you can still do steps 1–4 and everything except the footprint search.
1. Open Settings
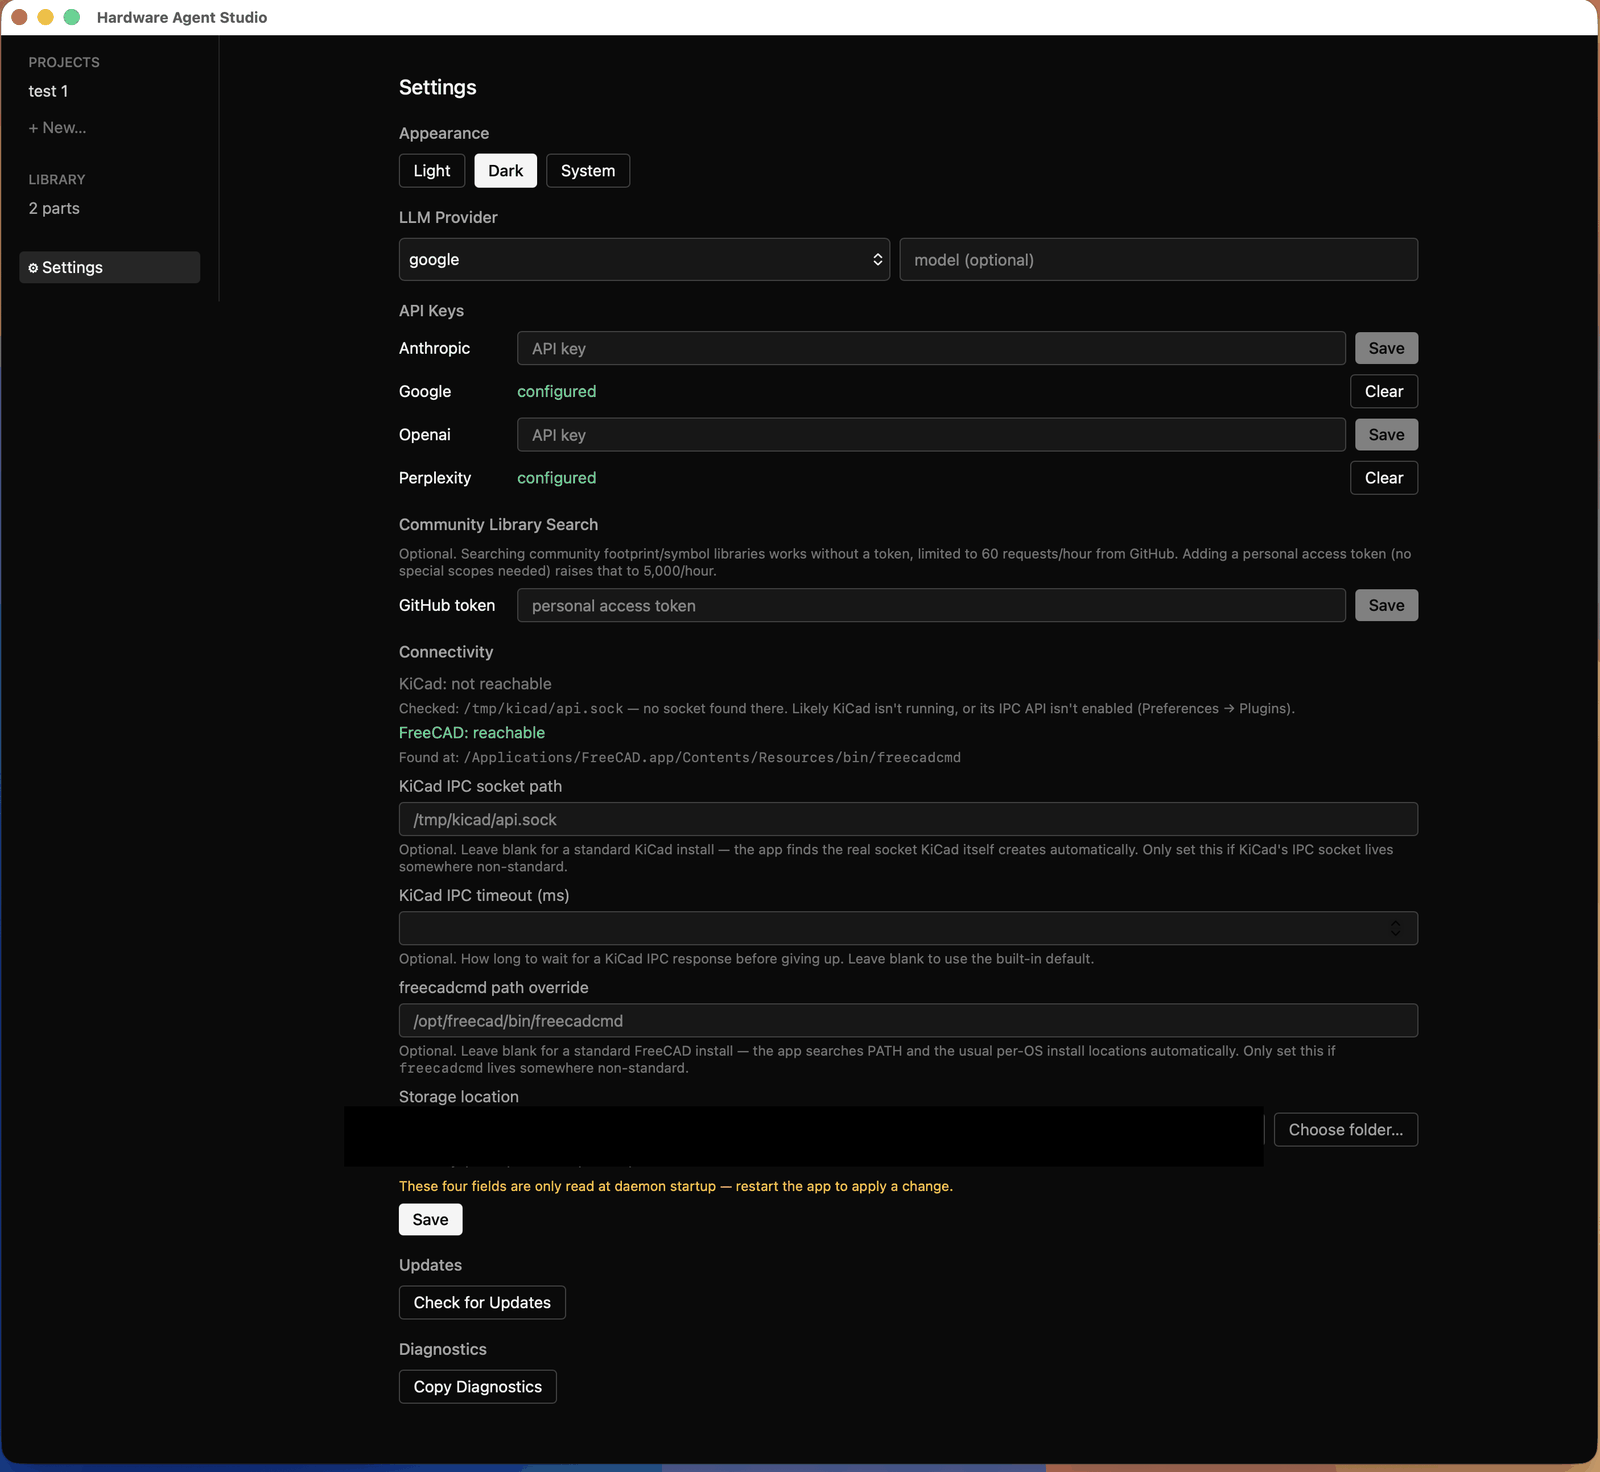
Section titled “1. Open Settings”Settings lives at the bottom of the left rail, and in the app menu under
Hardware Agent Studio → Settings… (Cmd+,).
2. Choose a provider and add a key
Section titled “2. Choose a provider and add a key”The app ships with no model and no key. Pick one of Anthropic, OpenAI, Google, Perplexity or Ollama, then paste your API key. It goes into your operating system keychain, not a file on disk.
Choose Ollama if you would rather nothing left your machine — see Privacy and your data for the trade-offs.
The key takes effect immediately. No restart.
3. Check that KiCad is reachable
Section titled “3. Check that KiCad is reachable”Still in Settings, the diagnostics section reports whether KiCad and FreeCAD were found and whether KiCad’s IPC server is responding.
If KiCad is installed but not reachable, its API is almost certainly switched off — it is not on by default. In KiCad: Preferences → Plugins → Enable KiCad API, then re-check here.
If it was not found at all, point the app at it with the path override in the same section.
4. Create a project and say what you are building
Section titled “4. Create a project and say what you are building”Projects live in the left rail. Create one, and give it a sentence describing what you are actually making — “a macropad with an RP2040 and twelve keys”.
That sentence is optional and you can add or change it later. It is worth writing: it is passed to the assistant as context, so answers are about your board rather than about parts in general.
5. Find a part
Section titled “5. Find a part”Open the Components tab and search a real part number — ATtiny85 is a good
first try because its datasheet is thorough.
You will get ranked candidates with a confidence signal and a link to each datasheet. Nothing is chosen for you. If you typed something slightly wrong, you get a did you mean card rather than a silent correction.
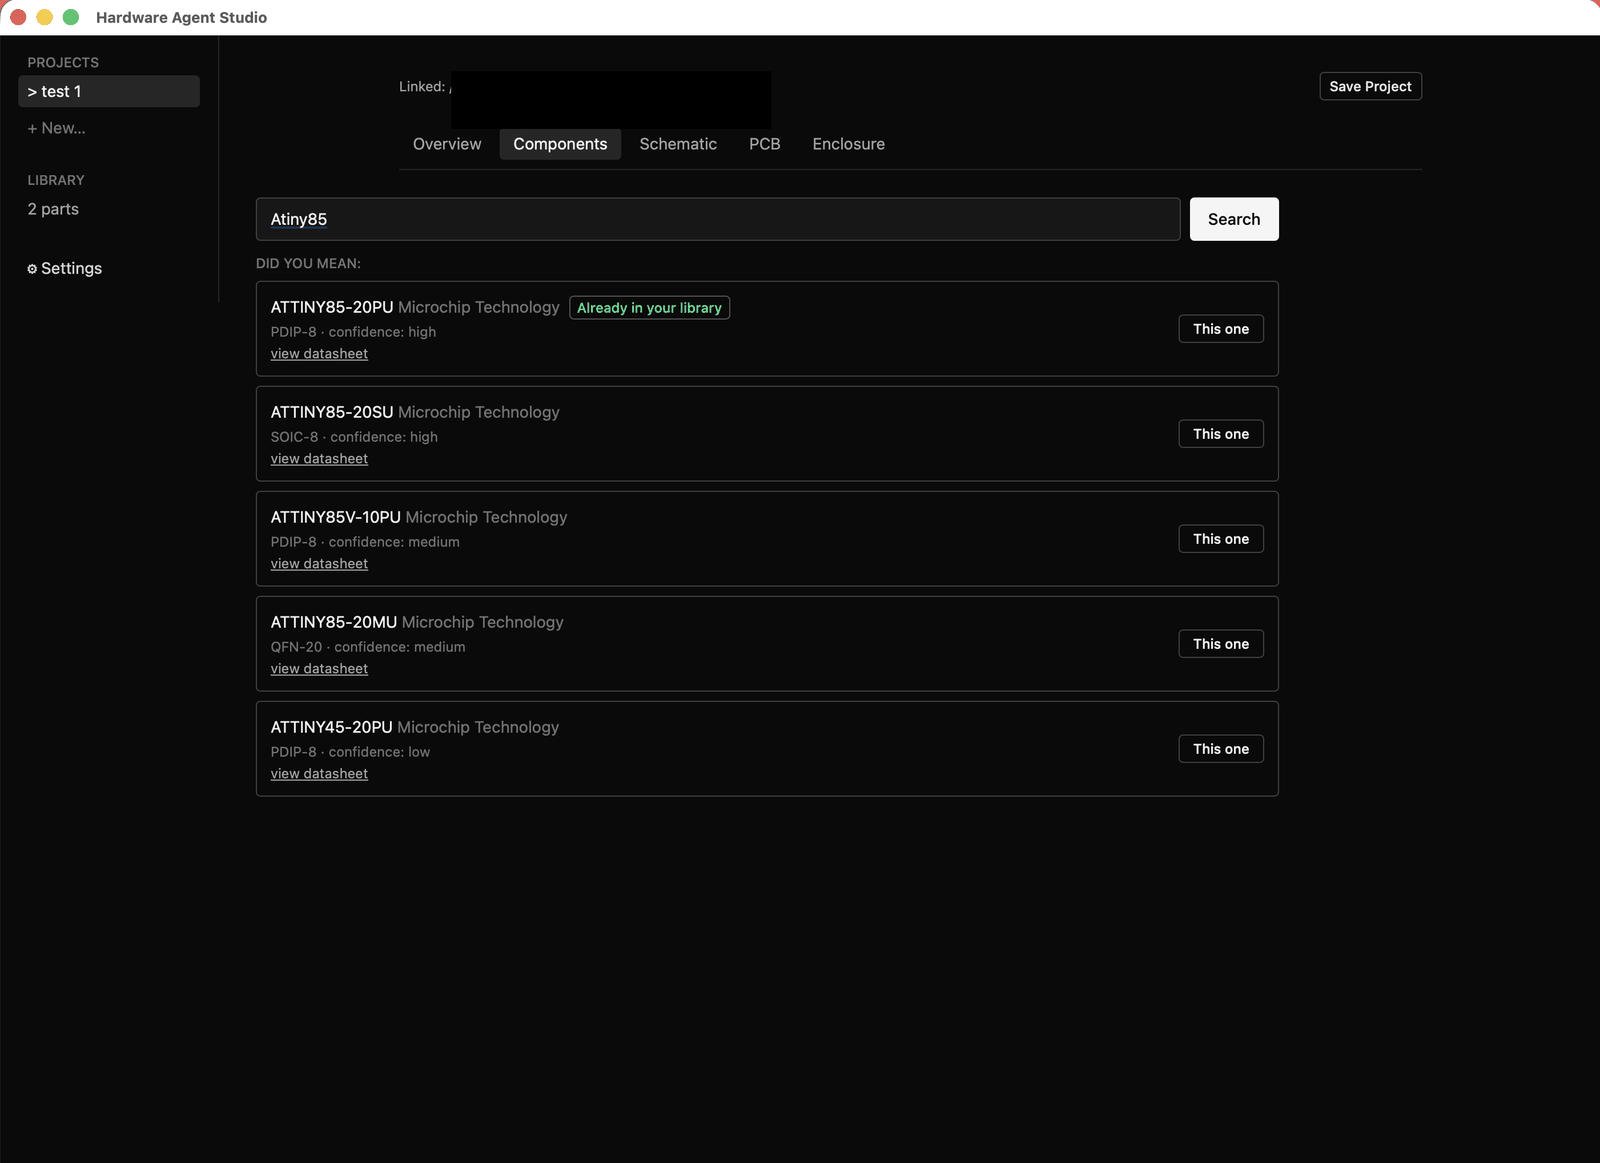
Confirm the one you want.
6. Look at what came back
Section titled “6. Look at what came back”Part Detail shows the pin table — numbers, names, electrical types — extracted from the datasheet, with a record of which model produced it.
Then click Generate design requirements. This is the feature worth understanding: the app locates the relevant sections of the real datasheet, extracts what the part needs around it, and shows a plain-language summary per concern with the underlying quotes collapsed beneath. Click a page citation and the cached PDF opens at that page.
On a long datasheet this takes a little while. It is reading the document.
7. Save it
Section titled “7. Save it”Save to Library makes it a real object you own. It is now available in every project, with its pins, package, datasheet and provenance intact — and its footprint, once you attach one, is shared rather than duplicated.
That is the loop. From here: